Friday, April 6, 2012

Framing 101

I used to work at a frame shop.  I really loved that job.  Although, the lady I worked for was mean, unforgiving, and she hated Democrats.  Now I am a firm believer that God allows us to experience things for a purpose, sometimes which remains untold, but of this I am sure:  I learned to have the most exquisite attention to detail in the back room of that art gallery.  

This is a frame I designed and built for Ben when we started dating.  Declare was the band he was in at the time--so dreamy!  


It went something like this:  Frame goes out front with a SPECK of dust (which she always referred to as junk) on the inside of the glass.  (Customer would never notice SPECK of dust.)  Boss lady sporadically nightly inspects each piece, and discovers an imperfection.  She is mortified.  I hear about it the next day, and get to spend the next five days with her breathing down my neck.

Without realizing it, I learned quickly to achieve perfection; there were no excuses, no wasted materials, and no missed deadlines.  Or else.

I have carried this skill with me through life, and I know that it will prove to be invaluable.  I just need to be careful about expecting everyone else to have the same drive for perfection.  It can, will, and does come across as obnoxious on my part.

All of that to say: I hope to encourage some of you who have the privilege of working for or with someone that doesn't quite mesh with your style.  View it as an opportunity for growth, and try to sit under the positive things they have to share--even if shared through negativity.

Andddd back to the regularly scheduled post: Framing 101!

We start out with what is called a "ready-made" frame.  These are what most people would call a frame that you would find at Michaels, AC Moore, Target, wherever.  Some of them are wall frames, which have no "stand", if you will.  I am working with wall frames.


Disassemble the frame, and separate the components into three piles. 
1. The backing and the padding, if there is any. 
2. The mat and the placeholder "art" that came with the frame.
3. The frame itself and the glass, face down so the glass is supported off of your work surface by the rabbet (the groove which holds the glass in place).

First, we will focus on the mat and the placeholder art.  I mentioned before that I was using scrapbook paper to "mat" the prints for the nursery. 


I chose this feather print, and then another charcoal style with a little bit of shine and texture.  Framing four prints, I decided to do two of each background to keep it exciting but still streamlined.  I am afraid to get TOO busy in her little nursery.

Since the opening of the mat was larger than the surface of one sheet of scrapbook paper, I joined the paper in the most inconspicuous spot, which keep in mind will be mostly covered by the print anyway. 


Next step: attach the paper to the placeholder art.  I used scotch tape, which is NOT archival.  It will not last forever.  I figure these will not stay the same for 10 years, so it probably isn't a big deal.  There are archival tapes and papers you can buy, but if you are that worried about preservation, you probably shouldn't be framing it yourself to begin with.


We line up the mat over top of the placeholder art, to be sure that everything is covered by the matting.  In this case, I was sure to place the join mark at the bottom part of the mat, since eye level in our house (we have 7 foot ceilings!) falls at the top of the frame. 


Trim the excess paper off, and hold it up to be sure everything is flush.

The white matting you see here is called a floated double mat.  There is a small bit of space between layers, which gives it a shadowed look for more depth.  


Next, position everything how you'd like it.  In this case, I chose to have even borders, but sometimes, it is more fun to leave more space on the bottom border.  

Attach your art to the paper with scotch tape, or something else that won't show through.  Again, not archival, but works for this case.  Be careful with glue, it often changes the texture of what you're working with.


Finally, we need to reassemble everything face down.  Be sure that the hanging hook is at the top of the frame, and that your art is facing upwards in the right direction.

And don't forget to check for "junk" inside the frame!  Nobody wants to see fingerprints inside the glass!

I had some wire on hand that I used to string through the hooks in order to have some way to hang them on the wall.  Wire works best because it is very durable!  Be sure you have a snug fit, and that if you are hanging more than one, that you place the wire consistently taut, or else you will have trouble getting everything to hang evenly.


Full nursery reveal coming soon!  We are waiting on these last two prints to arrive from Naptime Diaries!   Meanwhile, I need to figure out how to photograph the paint color accurately...

People often ask me how my pictures look so fancy, and this is how I do it.  Buy frames with matting, take your time in assembly, be sure they are clean from the inside out, and hang them with precision.  You will step up the look of your prints and art by leaps and bounds.

Happy Framing!

Sprucing up the Train Case

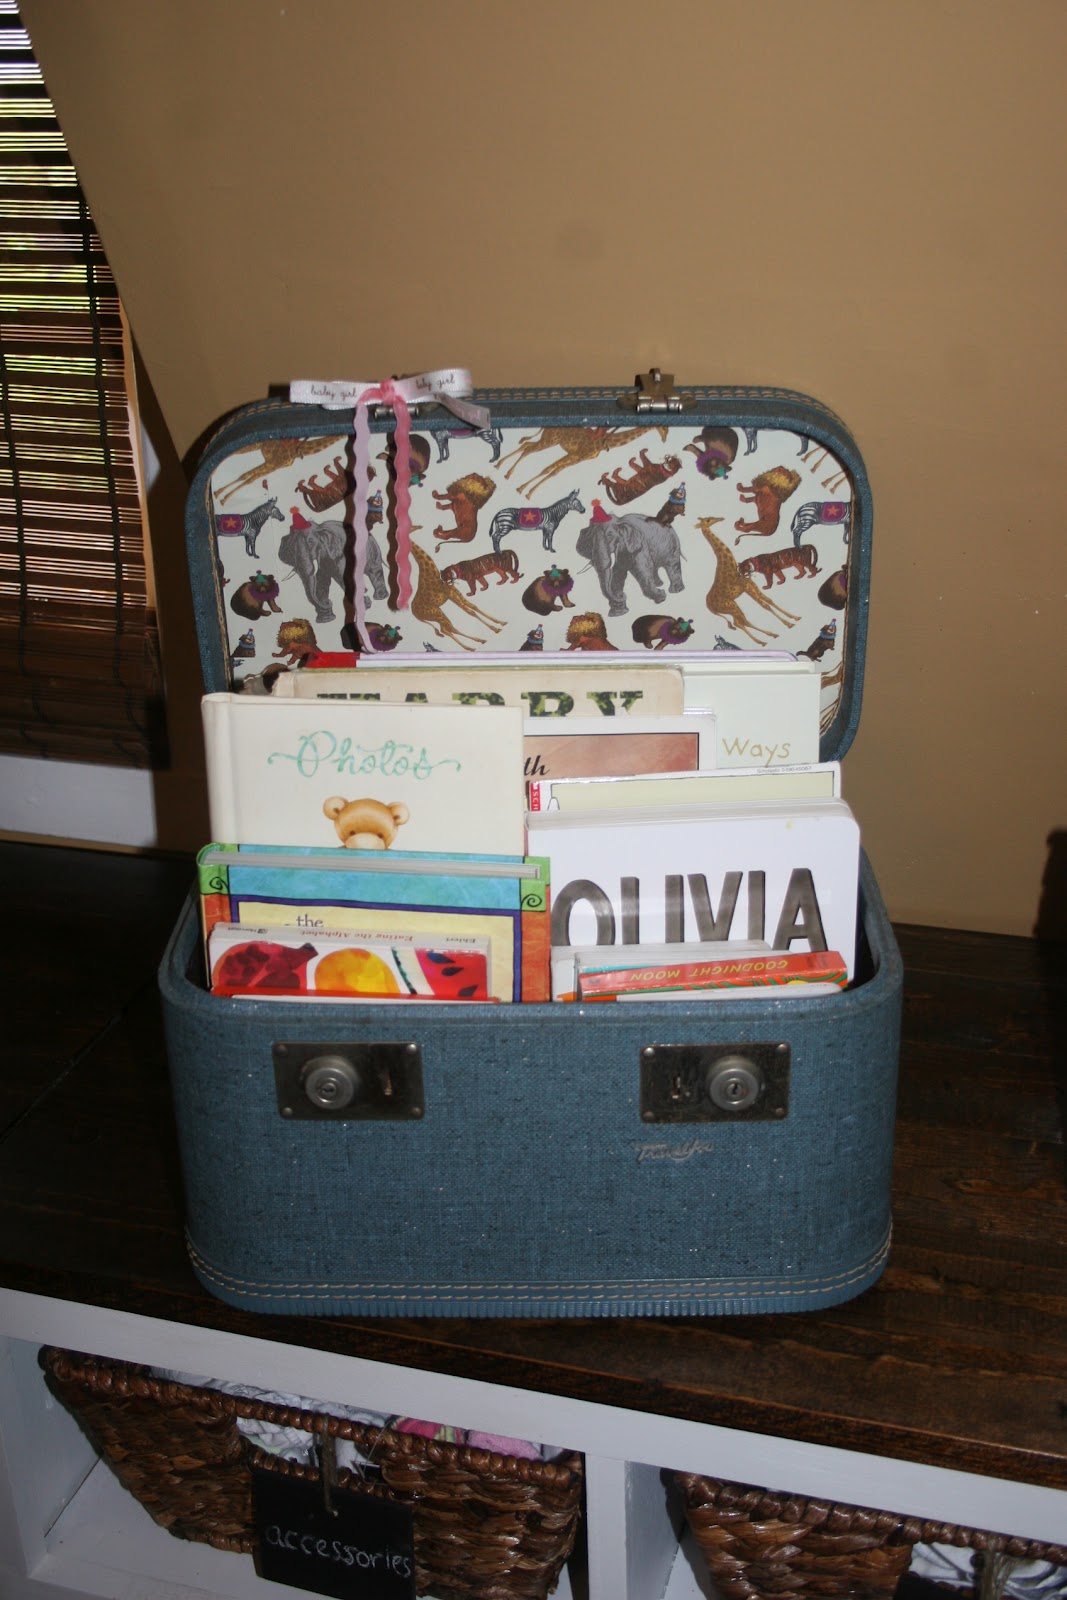
I discovered this train case at the Habitat ReStore a while back for $5.  It is just like one my grandma has, which is how it caught my eye.  It wasn't in the best shape on the inside, but I figured I could attempt to dress it up somehow.  I knew I wanted to keep books in it for now, so I decided that I could leave the inside as-is. 

While I was out getting materials for the Hanging Chalk Tags, I ran through the scrapbook paper section to grab some impromptu "matting" for the prints I needed to hang.  This circus paper caught my eye--clown free and full of rich colors that fit right into her nursery.  I didn't know what I could use it for, but at a quarter per sheet, I couldn't leave it behind.

On the way home, I remembered the train case.  The scrapbook sheets are 12 x 12, so I knew I'd have to do a little patchwork...but it was definitely worth the try.

I got started by taking some scrap paper and fitting it inside the top of the case in order to make a template.  Much easier than measuring, especially with the rounded edges.


I removed the paper and trimmed off the excess, and then traced around it onto a piece of cardboard, which was actually from the frames.


Once I cut out the cardboard, I inserted it snugly into the top of the case, just to be sure it fit.  

You can also get a good glimpse inside the case---I'll get to that eventually.


Finally, I traced the cardboard template onto the back of the scrapbook paper, trimmed the edges, and adhered it with tape.  Probably not the best way to do it, but I like to work with what's on hand.  And by the time it falls off in a few years, we will be ready to change things up anyhow.


TaDa!


There were about two inches of space that the paper didn't cover, so I just patched it together in two different spots to try to match as seamlessly as possible.  It's circus paper!  And therefore totally appropriate that the zebra's head is coming out of the sideways tiger feet.  Please tell me you wouldn't have noticed if I hadn't pointed it out?


Is there anything you could do with scrapbook paper, besides scrapbook?  It is so affordable, and there are so many styles and varieties, I will definitely be keeping that in mind for future projects.

Hanging Chalk Tags

"Everything in its place."  


I probably say that to myself seven thousand times a day.  I get twitchy when things are out of order.  When I go to find something and it isn't there, my blood immediately begins to boil.  I love to be organized!


We are anticipating and hoping for lots of help when the baby arrives, so I could already imagine her clothes becoming a hot mess after the first load of laundry.  How would anybody know where to put things?  I thought for about two seconds and came up with this solution: Hanging Chalk Tags.


Not super original.  Not super creative.  Not super exciting.  But super duper functional.  And super duper budget-friendly.


Which brings us to last Saturday.  I went to AC Moore to track down some cut-out wooden luggage tags.  I couldn't find any, so decided to make my own.  The most inexpensive way to do this was to buy a six-pack of these small sheets of wood.  I used a 50% off coupon and picked up a pack of twine.  Less than five bucks for both.  I already had a quart of chalkboard paint on hand, which is why I got the idea in the first place.


I wanted to finish this by the time Ben got home from work, so I decided to use the hand miter saw to half the pieces.  Before I made any cuts, I quickly ran up to the nursery to see what the sizes would look like in comparison to the baskets.  


Once I made the cut, I sanded down the rough edge with a heavy-grit sandpaper.  As you can see, they were pretty snaggled (made up word alert).


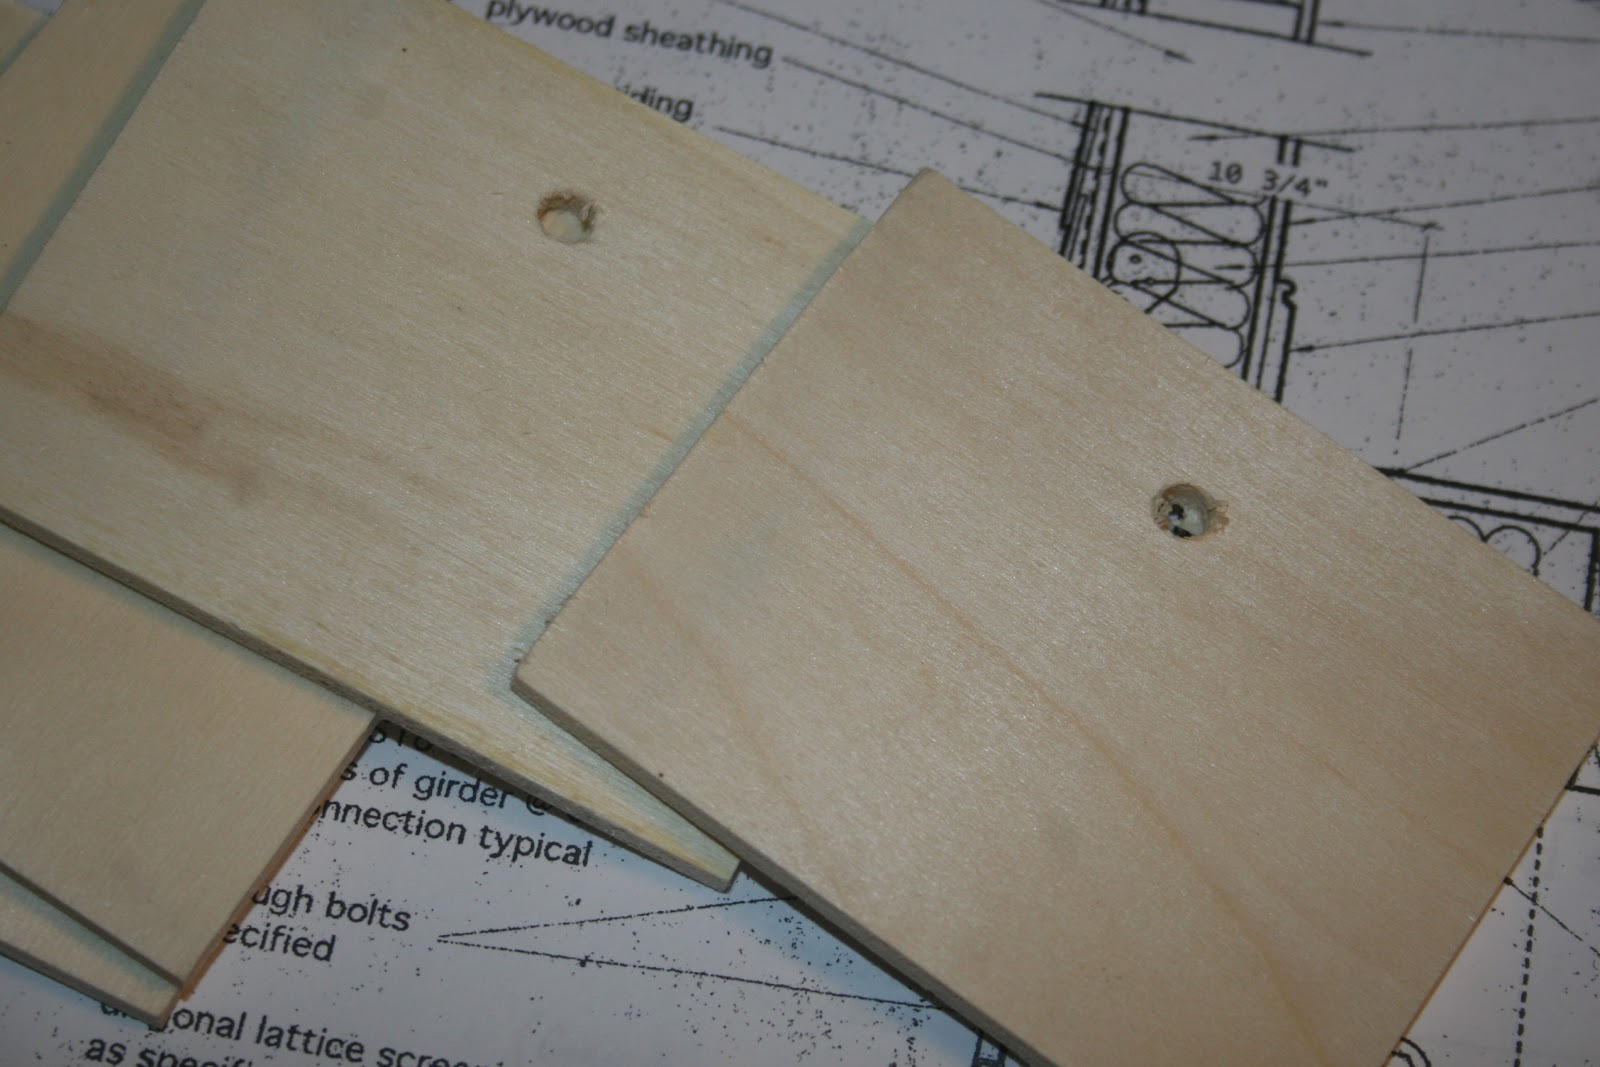
Next, I used a power drill to make the holes for the twine.  I just guessed on the bit size, I probably should have gone another size up, because when it came to threading the tags, it was a little trickier than it could have been.


So with the edges sanded and the holes drilled, it was time to paint.  I laid down some heavy paper (I use old architectural plans that I get from my boss's dad, who is an engineer...we also use these for wrapping paper!) to protect the table, and got to it.


First, I painted all of the edges of the tag, so that I didn't get fingerprints all over the place.  Then I laid them down and painted three coats on each side.


The wood soaked up the paint very quickly, so it wasn't long until they were ready to thread.


I left a good bit of length on each, because I wanted to be sure I had a lot of flexibility when it came time to hang.  Re-threading them was not an option for me!


Finally, I went upstairs and made a list of what was in each basket, trying to keep things in a cohesive style.  This is what I came up with:


Accessories (I didn't know babies had accessories either...)
Jammies
NB Onesies and Outfits
0-3 Onesies and Outfits
Pants
6-9 Onesies and Outfits
Skirts and Bloomers
9-12 Onesies and Outfits
Holidays


We have an extra bin, so I left that one blank.


You can see that they definitely aren't perfect, but that is a vibe that works for us.  When it comes time to change up the tags, we can just wipe them off with a damp cloth, and once it has dried, re-label.  


And ask us in a year where we will store her clothes once they are larger than the size of my socks.


I can't wait to show you around the nursery!  Hope you've enjoyed the little glimpses of the built-in that Ben made with his bear bare hands.


Little Nursery Projects...Done and Done!

We have all but completed Baby O's nest.  We are waiting for a few more things to arrive in the mail, and then I will have a finished product to share!


For now, I will fill you in with three super simple projects that took about an hour total for each.


1.  Hanging Chalk Tags
2.  Sprucing up the Train Case
3.  Framing 101


Actually, I will post these all separately so they will be easier to find later.  Four in one day!  I am also halfway working today--I usually take Good Friday off, but with the baby coming, I couldn't afford to take the whole day.  I am trying desperately to stay as caught-up as possible!


ALSO, we are going to continue a Good Friday tradition this evening...stay tuned for that.  Hopefully you will hear from me tomorrow.  It is probably too late for most of you to get in on the tradition with us, and you'll see why when I post!


PS-We went to the beach yesterday after I got off work, for about 45 minutes before small group.  Today we have a high of 61.  This is NOT a complaint!


Wednesday, April 4, 2012

39 Weeks Pregnant Means...


Eating oregano by the spoonful and fresh pineapple by the gallon.  Has anybody had any real luck with that inducing labor?!?!  My sister swears that pineapple did the trick for her...


Nesting...can't stop won't stop.   Projects are everywhere, and every single one is calling my name!


Taking one of these in honor of my fellow Scott outlaw, Ange.  She has been so diligent about recording her pregnancies and challenged me to take at least one picture before Baby O arrives. 


Spoiling Hank.  This particular picture is me feeding peanut butter, which never gets old.  This poor dog does not know what is coming. 

Monday morning he rode with us to drop me off at the office.  I opened the car door and he got right in the car seat.  I yelled at him.  Poor guy.


Watching little surprises come up from the ground.  Bulbs are so much fun to watch for this time of year!  My aunt gave us a ton of bulbs, and Ben swore that he planted them.  The proof finally showed up--ha!


Who knows, maybe I won't need to write a 40 Weeks Pregnant post!  How many of you were early, late, or right on time?

Tuesday, April 3, 2012

Restaurant Remarks: The Bowens Island Experience

I have lived in Charleston for eight years, and I am sad to say I have only been to Bowens three times.  Ben took me for the first time on my birthday two years ago, and I was pleasantly surprised.  Ben's sister Sarabeth treated us to a night out last week, and we decided on Bowens Island, where the experience was exponentially enhanced by steamed oysters.  Read on. 


Bowens was originally a one-story cinderblock building, but it burned down and they rebuilt on stilts.  The current place is a super basic structure built totally out of wood, now covered in marker graffiti. 


People don't just come here for the food.   The view is one to write home about, especially at dusk.  There is plenty of outside seating, which tends to be more pleasant in the summertime, since there is no air conditioning inside.


It was packed on the Thursday night we went, so I was tasked with saving a table while Ben and SB stood in line to order.  Most excellent people watching ever.


They ordered a tray of oysters (!!!!!!!!!!) which we quickly shucked and demolished while we were waiting on our food.  There was a little bit of wait for the food, which seemed longer than normal, probably due to the crowds.  I was in good company though, so it didn't much matter.


My honey loves some steamed oysters.  He slips into oyster coma and savors every stinking bite.  I can't blame him though, they are salty, perfect goodness.  These were some of the best I've ever had; piping hot and juicy.

My favorite way to eat steamed oysters is on saltines, dipped in cocktail sauce, and spritzed with fresh lemon.  Which is probably what I will be thinking about during labor.  Just being honest.


They serve their cocktail sauce in re-purposed Gatorade bottles.  It is a bit runny and not horseradishy enough for me, but I still slurp it down with no complaints.   They don't have saltines or lemon, at least that I know of.


I really hope my midwives aren't reading this. 

I ordered the small (1/4 pound) shrimp platter, which I think runs for $11.  This picture is deceiving, it is so much food and I can never eat it all.  The shrimp are lightly battered, and they taste like shrimp, NOT like a fryer.  Their hush-puppies (the two round things on the right) are also really delicious.  I'm not a huge fan of their coleslaw (top right in the cup), but as you can see you only get about two forkfuls of that.  And who cares about coleslaw anyway?

SB and Ben ordered the seafood platter and fried oyster platter, respectively.  They swapped things around, and I know they both agreed that the fried oysters were out of this world.  No one commented on the crab cake, but I can tell you from past experiences that it isn't the best.  (Disclaimer: I am from Maryland).

They also have Ginger Ale in their soda fountain, which gets me excited every time.

A must-go for anybody visiting Charleston, Bowens Island is only about 15 minutes out of the city, but on the way out to Folly Beach.  Do yourself a favor and skip Hymans (downtown on Meeting).  Super-duper overrated.

For directions and a little more history, you can visit their website.  Their hours are non-traditional so be sure you check to see that they are open before you head out!


Monday, April 2, 2012

My Friends are Gifted.

I have such incredibly talented people in my life, and I've been looking forward to writing this post for a few weeks now!  Little O has received so many gifts, and I just couldn't believe the blessings that kept pouring in.  God has provided everything she could ever need!  I have already told Ben that she has more clothes right now than she will ever have again in her whole life, so she'd better not get used to it--ha!

Anyhow, I wanted to share all of the handmade things that were created just for her.  Really, I just wanted to brag on these amazing women!


These burp cloths were made by our good friend Polly.  Ben has known her for years and she has been so special to both of us!  I had NO idea that she was so crafty--and they look so fancy that she had to tell me they were handmade.  Hopefully Olivia won't barf on them.  Polly is seriously fascinating and inspires me to up my travel goals!


The hairbows, onesie, and burp cloth were made by the sweetest Hilary!  We went to the same college and it has been so much fun getting to know her little by little.  Follow her on twitter--she has the most precious babygirl and her Etsy store has some hats I have been eying to buy for gifts in the near future.  I am beginning to embrace the monogram now that Hilary is in my life--to my northern friends, I think you guys should start the trend.  People in the south monogram their cars.  I don't know if I will ever go that far ;)


This dress is just precious!  April even added "O" buttons!  I can't wait to put babygirl's hair in pigtails and dress her in this outfit.  April is a full-time artist, with a really interesting twist.  Check her out!  I have known her and her husband since my freshman year of college (8 years...wow), and they live right down the street from us.  They are fixing up their house and she too shares lots of fun stuff on twitter.

My dear friend Amanda made this real-life bunting banner!  She and a few other friends hosted one of the best baby showers ever, and this was part of the decor (I will share more when I reveal the nursery!).  I wanted to hang this downstairs so everybody could enjoy celebrating baby O, whenever she arrives!  I think this banner will be a part of birthday and other very special traditions.  Actually, I know it will.

She and her hubby are heading to Africa next month to do medical missions.  So awesome.  Her husband Micah and my husband Ben are the best of friends...they really do go way back.


These onesies are so much fun!  Jill made them--there is one for every holiday and some for the months in between.  Clever, I tell you!  Jill also makes amazing cards, and I wish I had taken a picture of one of them before I sent them all.  Jill and her husband did our marriage counseling before we got married, and then we stayed on with them for "therapy" (small group with just the four of us...ha!) for the next year.  They still lead our small group and are now mentoring us on becoming parents.  Whoda' thought?!


Hopefully I didn't leave anything out--Olivia really has been showered with so many things--each such a special reminder of the fantastic people in our life, some near and some far.  Truly blessed I tell you!